
AI BODY GUIDE · SMARTGENIUSAI
How to Make a Body Look Slimmer in a Photo Without Photoshop
A practical AI workflow for creating a slimmer-looking body in a photo without manual Liquify or background warping.
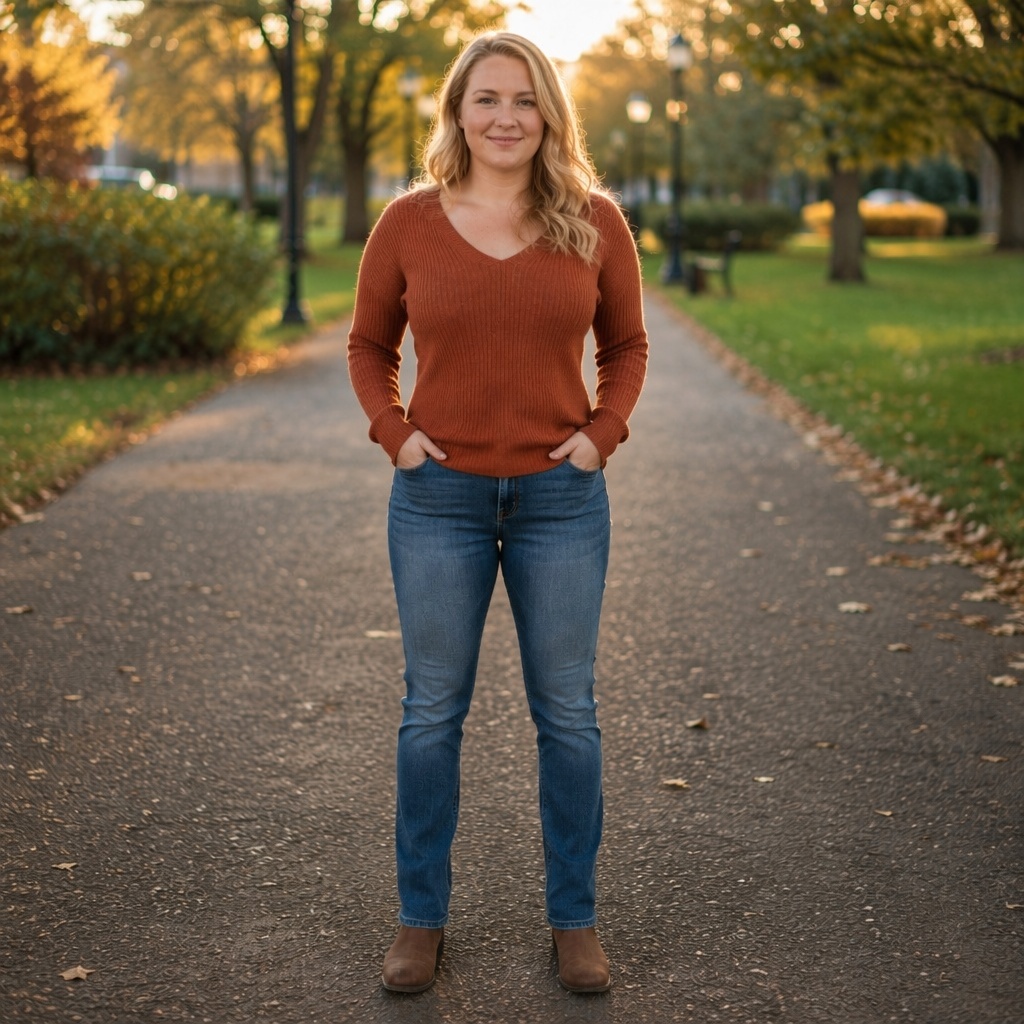
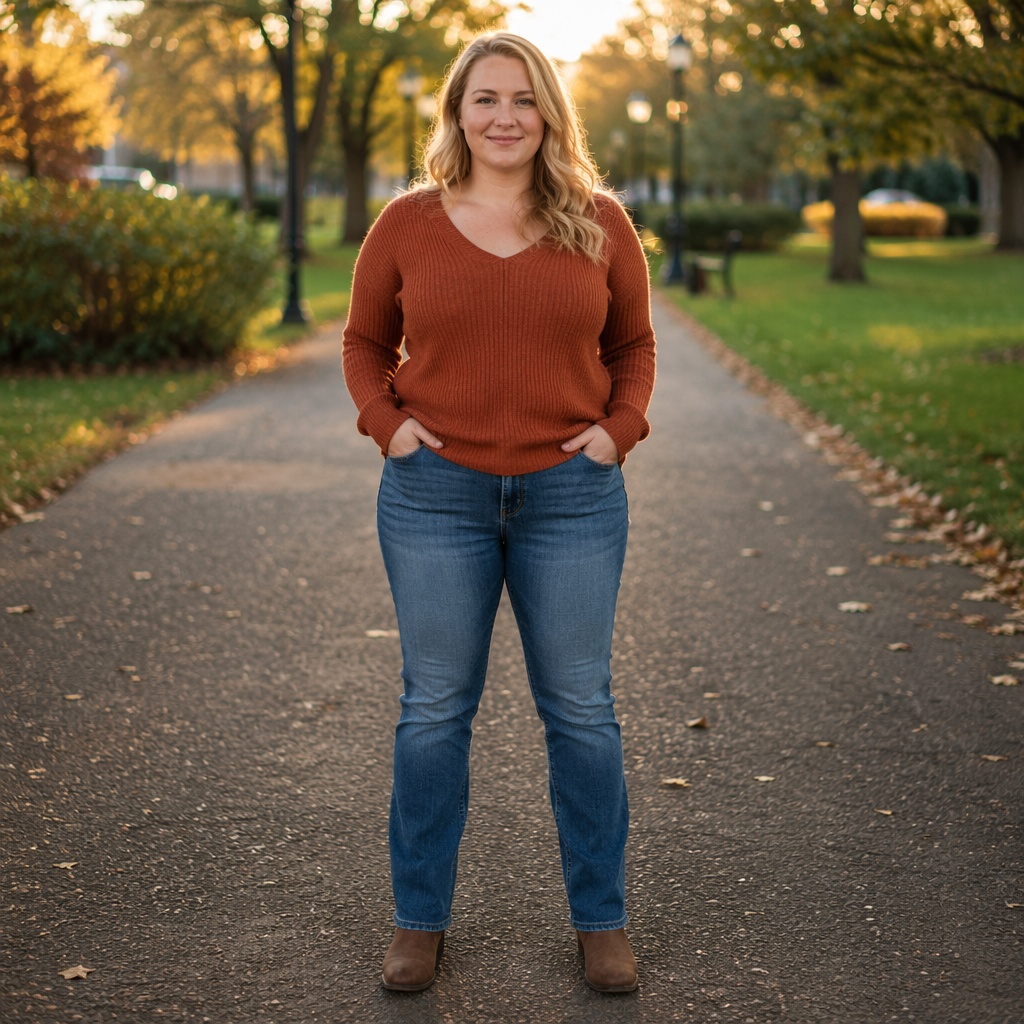
Use a clear portrait and start with the lighter slimming option. Compare the waist, torso, arms and legs together, then inspect clothing seams and nearby background lines. A natural slim edit should change the silhouette coherently rather than squeezing one area.
Traditional slimming tutorials often begin with Photoshop Liquify, careful masking and repeated checks to make sure doors, walls or furniture have not bent around the subject. That workflow can work, but it is slow and easy to overdo.
An AI body editor takes a different approach: it regenerates the body appearance in context. SmartGeniusAI separates “Slim down slightly” from “Slim down noticeably,” which is useful because a restrained edit and a strong edit solve different visual goals. The correct choice depends on the photograph, not on a universal amount of slimming.
Start with the smallest useful change
| Direction / check | What it means in practice |
|---|---|
| Slim down slightly | Best for a subtle comparison where you want the original proportions to remain close. |
| Slim down noticeably | A stronger whole-body change; useful when the lighter version does not create enough visual difference. |
| Slim + fit | Worth testing when the goal is not only narrower proportions but also a toned, fitness-oriented appearance. |
| Full-body source | Makes it easier to judge whether torso, hips and legs remain proportional. |
| Waist-up source | Can work for upper-body edits, but it cannot tell you whether the unseen lower body would be coherent. |
Start with a source that actually shows the body you want to evaluate
A clear source photo removes ambiguity before the model has to invent anything. For full-physique comparisons, a standing full-body frame is the easiest to evaluate because you can see shoulder width, torso length, hips, leg proportions and how the person occupies the scene.
Waist-up portraits can still be useful when the intended change is concentrated in the torso, but do not treat them as evidence of what an unseen lower body would look like. If arms cross the stomach, a coat hides the waist, or furniture covers the legs, the generated image has less visible structure to anchor its decisions.
A controlled workflow for slimming photo edit
Choose one strong source
Use the clearest image available and make sure the body regions relevant to this article are visible enough to evaluate.
Test one direction at a time
Keep the source fixed and generate one physique direction before comparing a stronger or different preset.
Compare against the original
Review silhouette, anatomy, clothing, lighting and nearby scene geometry instead of judging only the edited body.
Keep only the coherent candidate
Reject results with broken hands, implausible proportions, damaged clothing or background artifacts even if one body region looks good.
Open the Slim Body, upload the source and keep the original visible while you test the relevant preset. Change one variable at a time. If the first result is too subtle, increase the transformation in a second comparison rather than changing pose, crop and body direction simultaneously.
Why “narrower waist” is not enough
A convincing slimmer result changes several relationships at once. The waist may narrow, but arm thickness, torso volume, hip contour and the way the outfit hangs can also need subtle adjustments. If only the center of the body moves inward, the photograph can resemble a Liquify edit even when no manual warping was used.
Check negative space as well as the body itself. Gaps between the arms and torso, the outline between legs, and the distance from the body to nearby objects are places where inconsistent geometry becomes easy to notice. These spaces should look clean and natural after generation.
How clothing changes the difficulty of slimming photo edit
Clothing is part of the body-editing problem because fabric has to respond to the new silhouette. Fitted tops, simple sportswear and clean trouser shapes make proportion changes easy to read. Heavy coats, oversized shirts, complex prints and garments folded across the waist hide anatomy and give the model more texture to reconstruct.
Do not expect a physique edit to reveal exact anatomy underneath opaque clothing. Judge whether the garment itself hangs plausibly on the new body. Check logos, buttons, pockets, zippers and repeated patterns; these details often expose a generation that looked convincing at thumbnail size.
Perspective can make a correct edit look wrong
A camera close to the subject can exaggerate the nearest body parts, while a wide-angle lens can stretch limbs near the edge of the frame. The generated physique should still respect that perspective. Compare head size, torso length and limb scale with the original instead of judging the new body against an imagined front-facing reference.
Mirrors and selfies deserve extra attention because the camera may be above, below or off to one side. For slimming photo edit, a technically clean result can still feel artificial if it silently “corrects” perspective that belongs to the original photograph.
Review the result at three levels
At normal viewing size, ask one simple question: does this still look like the same person photographed in the same moment? If the body edit becomes the first thing you notice, step back and compare a more moderate generation.
Then zoom in. Inspect hands, elbows, knees, waist boundaries, fabric seams and any object touching the body. Finally, look outside the subject at straight lines and repeating textures. This three-level review—whole image, anatomy, scene—is faster than checking random details.
Compare silhouette change, not a number on an imaginary scale
A photo cannot tell you how many kilograms a generated body represents, and trying to translate a visual edit into a weight number creates false precision. Instead, describe what you can actually see: a slightly narrower waist, less volume through the torso, slimmer arms, or a more streamlined overall silhouette. Those are visual properties the image can communicate directly.
This approach also leads to better editing decisions. If the stronger slimming preset makes the face-to-body ratio feel unusual, the arms too thin for the shoulders, or the clothing look unnaturally tight, the lighter version may be the better photograph even if the difference is less dramatic. A realistic slim edit should preserve believable relationships across the frame. Use the result as a design comparison, not as a target body measurement or a prediction of what weight change would look like in real life.
Common mistakes to avoid
- Pushing straight to the strongest slimming preset
- Using a source where the body is hidden behind furniture or another person
- Checking only the waist and missing inconsistent arm or leg proportions
- Ignoring stretched patterns, belts, pockets and shirt seams
- Treating an edited photo as a promise of real-world weight change
How to choose between two good results
When both generations look technically solid, prefer the version that needs less explanation. A successful edit should read naturally at normal size before the viewer studies details. Compare the face-to-body balance, shoulder-to-hip relationship, clothing fit and how the subject sits in the environment.
If the more dramatic candidate is visually exciting but the moderate candidate looks like a photograph that could have been captured that way, choose according to purpose. A creative concept can tolerate a stronger transformation; a profile or realistic portrait usually benefits from restraint.
When should you regenerate?
Regenerate when identity drifts, a limb or joint is malformed, the new body does not fit the visible clothing, or nearby geometry changes in a distracting way. A tiny texture difference is less important than a structural error. When the same problem repeats, change the source or choose a milder physique direction instead of producing many nearly identical failures.
Try the Body workflow on your own photo
Keep the source fixed and compare one physique direction at a time so you can judge the body edit against the same pose, outfit, lighting and scene.
Limits and responsible use
Body-shape editing should be treated as image manipulation, not as a measurement of health, attractiveness or physical potential. A generated slimmer, athletic or muscular result is a visual concept created from one photograph; it does not model metabolism, training response, medical conditions or long-term body change.
Use images you have the right to edit and avoid presenting a synthetic physique as an unedited record of another person. If the context could mislead viewers—especially in transformation claims, testimonials or advertising—label AI-edited imagery clearly.
Frequently asked questions
Can I make a body slimmer without Photoshop?
Yes. An AI body editor can generate a slimmer silhouette without a manual Liquify workflow.
Which preset should I try first?
Start with Slim down slightly and compare it with the original. Move to the stronger option only if the change is too subtle for your goal.
Does the background always stay perfect?
No generative edit is guaranteed. Inspect straight lines, repeating textures and objects close to the body before using the result.
Can the tool keep the same clothes?
That is the intended behavior, but clothing may be regenerated locally to fit the changed silhouette, so review patterns and details carefully.
Is a slimmer AI image a health recommendation?
No. It is a visual edit and should not be treated as medical, nutritional or fitness advice.
Final takeaway
For slimming photo edit, the best result is not simply the strongest transformation. Start with a suitable source, keep comparisons controlled, and choose the candidate whose anatomy, clothing, lighting, perspective and background still agree with one another. The edited physique should feel integrated into the photograph rather than pasted onto it.