
AI CLOTHING GUIDE · SMARTGENIUSAI
How to Change the Color of Clothes in a Photo With AI
Changing clothing color sounds simpler than replacing an outfit, but believable recoloring still requires the new shade to respect folds, highlights, shadows, seams, and material. The best result looks like the same garment photographed in another color—not like a flat tint painted over the body.
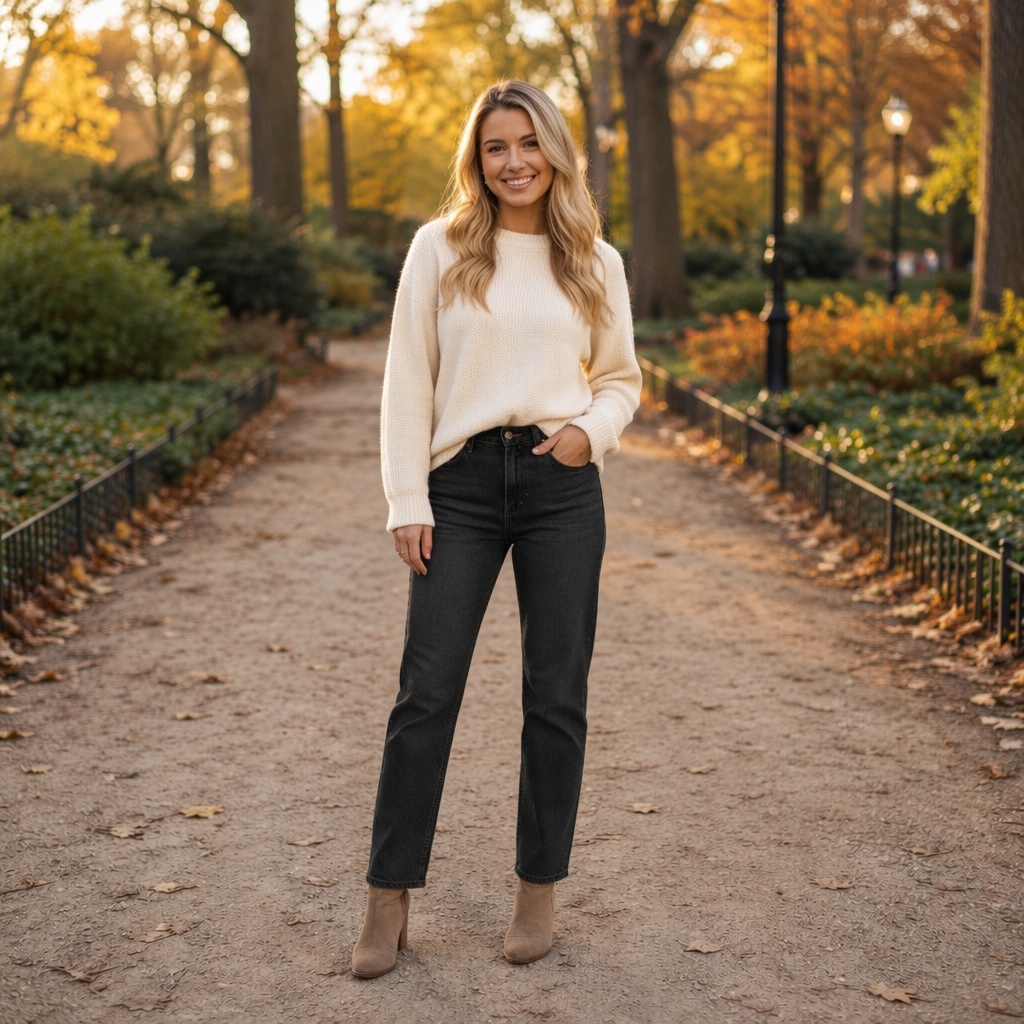
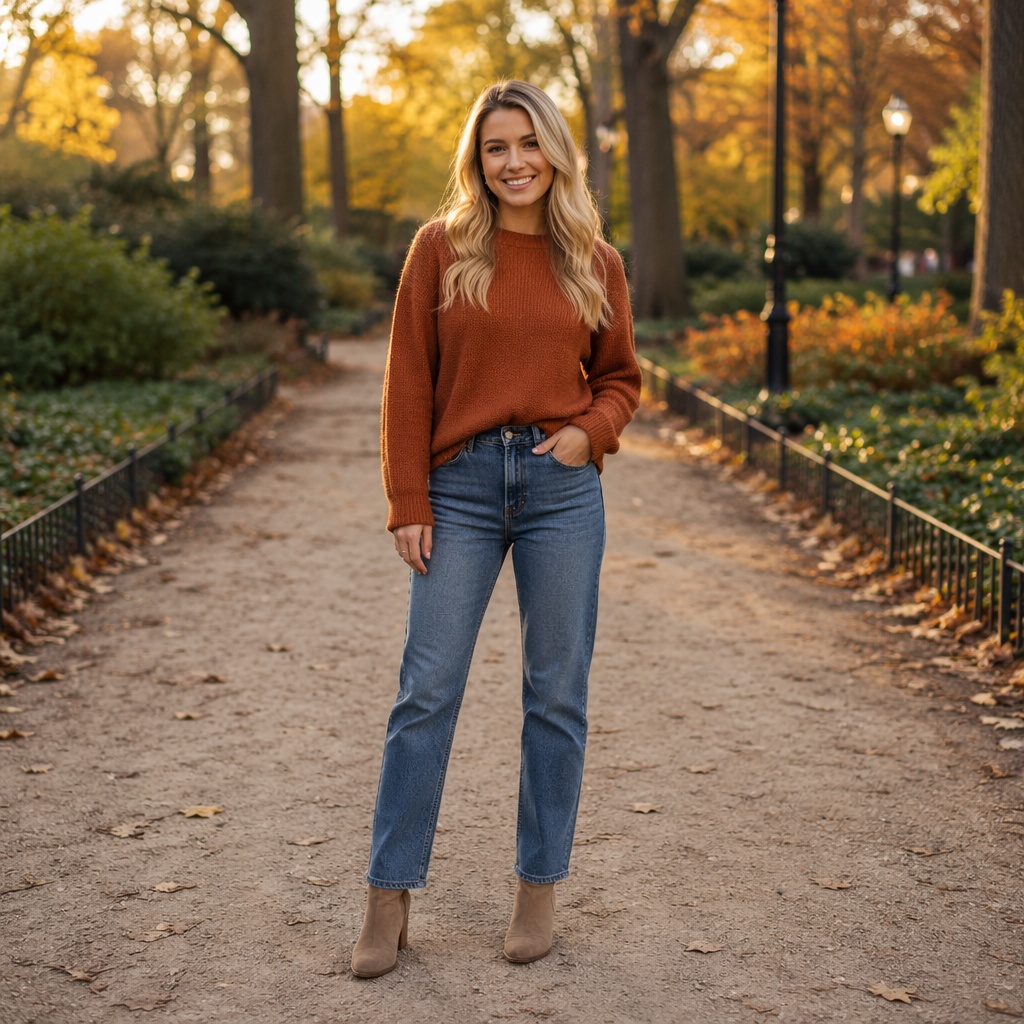
Recoloring should preserve garment identity. If the neckline, sleeve length, buttons, and fabric suddenly change, you are no longer comparing color alone.
Why this clothing edit is useful
For change clothing color in photo with AI, the value of AI is the ability to compare one styling decision on the same photograph instead of trying to imagine the result from a product photo or text description. Keeping the person and scene stable makes the clothing change easier to judge.
A change clothing color in photo with AI preview is still a generated visualization rather than a physical fitting room. Real size, tailoring, fabric stretch, construction and comfort cannot be measured from the synthetic image, so use the result to explore appearance and direction rather than to claim exact fit.
Separate color change from garment replacement
A true recolor keeps the original garment type and silhouette. The jacket should remain the same jacket, the dress should keep its length and cut, and the shirt should retain its collar and sleeve structure.
This distinction matters when you are evaluating whether a color works with the person or background. If the design changes at the same time, you cannot tell whether the improvement came from hue or shape.
Material determines how color should appear
Black satin is not visually equivalent to black cotton. Satin carries bright directional highlights, denim shows woven texture and faded variation, while matte knit distributes light more softly.
A strong recolor preserves those material cues. If the new shade erases texture or creates a plastic surface, regenerate or choose a less extreme color jump.
Watch skin and hair near garment edges
Color bleeding is easiest to notice where the garment touches the neck, hands, arms, or long hair. A burgundy top should not tint skin, and a blue jacket should not create blue strands unless reflected light in the original scene genuinely supports it.
Zoom into collars, cuffs, and hair-over-shoulder areas. These edge zones reveal whether the edit is localized correctly.
Judge the new color against the background
A color can suit the person yet merge with the environment. Cream clothing on a beige wall may lose separation, while bright red in a saturated scene can become visually dominant.
Use the full photograph when deciding, not only a cropped garment preview. Clothing color influences the composition as a whole.
Compare neighboring shades before making a large jump
If you are testing blue, compare navy, mid blue, and muted slate before deciding that “blue does not work.” Value and saturation can matter as much as hue.
The same logic applies to neutrals. Black, charcoal, warm gray, taupe, cream, and white create very different contrast even though they are often grouped together as simple neutral options.
White balance can change your judgment of color
Warm indoor bulbs can push white clothing toward yellow and cool daylight can make gray or blue clothing feel stronger. An AI preview inherits the source lighting, so the displayed color is not a calibrated product sample — apply this specifically when evaluating change clothing color in photo with AI.
When the decision is color-sensitive, use a source with neutral light and compare relative differences between shades rather than treating the screen as an exact fabric swatch — apply this specifically when evaluating change clothing color in photo with AI.
Preserve small garment landmarks while recoloring
Buttons, seams, pockets, zipper lines, embroidery, and trim help the eye recognize the garment as the same piece. A good recolor keeps these landmarks while changing the dominant fabric color — apply this specifically when evaluating change clothing color in photo with AI.
If landmarks move or disappear, the model has started redesigning the garment rather than recoloring it. Regenerate with a more explicit keep-style instruction or a simpler source — apply this specifically when evaluating change clothing color in photo with AI.
A controlled workflow you can repeat
Prepare the source
Choose a photo where the garment is visible and not heavily covered.
Set one clothing goal
Select one target color while keeping garment shape fixed.
Generate and compare
Inspect texture, shadows, edge boundaries, and reflections.
Refine the strongest result
Compare two or three nearby shades on the same source before choosing.
For this “How to Change the Color of Clothes in a Photo With AI” workflow, open the matching SmartGeniusAI Clothing tool and keep the original image available beside the generated result. That side-by-side reference makes it easier to notice whether clothing changed cleanly without unnecessary identity, pose, or scene drift.
Quality-control checklist
| # | Check | How to review it |
|---|---|---|
| 1 | Garment construction remains unchanged | Review this point specifically in the context of change clothing color in photo with AI before approving the draft image. |
| 2 | Fabric texture survives the recolor | Review this point specifically in the context of change clothing color in photo with AI before approving the draft image. |
| 3 | Highlights and shadows still describe folds | Review this point specifically in the context of change clothing color in photo with AI before approving the draft image. |
| 4 | Skin and hair are not unintentionally tinted | Review this point specifically in the context of change clothing color in photo with AI before approving the draft image. |
| 5 | New color separates appropriately from the background | Review this point specifically in the context of change clothing color in photo with AI before approving the draft image. |
| 6 | Logos, buttons and accessories remain coherent | Review this point specifically in the context of change clothing color in photo with AI before approving the draft image. |
A practical comparison exercise
Create three versions specifically for change clothing color in photo with AI: a conservative option that changes as little as possible, a balanced option that clearly expresses the intended style, and a stronger creative option. Keep the source photo, crop and pose identical across all three. This gives you a useful range instead of three nearly identical generations.
First compare the versions at normal viewing size and decide which one belongs most naturally in the original photograph. Then inspect garment construction remains unchanged and fabric texture survives the recolor. If the strongest creative option introduces structural errors, do not reward it simply because it looks more dramatic; the balanced candidate is often the better result for a realistic photo.
Finally, imagine where the image will be used. A social concept can tolerate more expressive styling than a professional profile, shopping visualization, or practical wardrobe comparison. For change clothing color in photo with AI, context should decide how much novelty is useful and how much consistency with the source should be protected.
Review the edit at three viewing distances
At thumbnail size, judge overall silhouette and whether the clothing belongs in the scene. At normal viewing size, inspect fit, layers, and color balance. At close zoom, check hands, hair, seams, buttons, patterns, and background edges — apply this specifically when evaluating change clothing color in photo with AI.
This order prevents you from spending time on tiny details in an image whose overall outfit direction is already wrong — apply this specifically when evaluating change clothing color in photo with AI.
Know when to regenerate instead of repairing
Regenerate when the failure is structural: missing fingers, impossible garment geometry, severe background warping, or identity drift. Those problems are usually more expensive to repair manually than to solve with a better generation — apply this specifically when evaluating change clothing color in photo with AI.
Minor texture issues, a tiny seam inconsistency, or small color cleanup may be reasonable to retouch later if the core anatomy and clothing structure are already strong — apply this specifically when evaluating change clothing color in photo with AI.
How to compare two good candidates
When two versions for change clothing color in photo with AI both look technically clean, compare the purpose of the image instead of searching endlessly for microscopic differences. Ask which result supports the person, occasion and visual message with less explanation.
For How to Change the Color of Clothes in a Photo With AI, coherence should beat novelty. A slightly simpler garment that follows the photographed pose, lighting and environment is usually more convincing than an elaborate option with one distracting structural error.
Common mistakes to avoid
- Changing pose, background, body shape and clothing together while trying to evaluate change clothing color in photo with AI.
- Using a tiny or heavily compressed source when the article goal is change clothing color in photo with AI.
- Keeping a change clothing color in photo with AI result with broken hands, collars or background geometry only because the overall style is attractive.
- Assuming a generated change clothing color in photo with AI preview predicts real garment size, tailoring or physical comfort.
- Judging only the center of the outfit in a change clothing color in photo with AI edit and forgetting hair overlap, accessories, hems and scene boundaries.
Try this Clothing workflow on your own photo
Use the matching SmartGeniusAI tool for change clothing color in photo with AI, keep the source fixed, and compare one controlled clothing change at a time.
Use generated clothing previews responsibly
A generated image created for change clothing color in photo with AI is useful for styling exploration, creative concepts, profile-photo experiments and visual planning, but it should not be presented as proof that a particular real product will fit in exactly the same way.
When sharing a realistic change clothing color in photo with AI result, use images you have the right to edit and avoid misleading viewers about a person, product, endorsement, or before-and-after claim. Clear labeling is appropriate when the edited nature of the image would otherwise be easy to misunderstand.
Frequently asked questions
Can AI recolor clothes without changing the style?
That is the intended use of a clothing-color tool, although every generation should still be checked for small structural changes.
Which colors are easiest to change?
Clear, well-lit garments with visible texture are easiest. Extremely dark, blown-out, transparent, or patterned areas can be harder.
Will patterns remain exactly the same?
Simple patterns may remain coherent, but complex graphics and text can change during generative editing.
Can I recolor only one clothing item?
A focused clothing-color workflow should target the selected garment, but check nearby accessories and layers for accidental changes.
Why does black clothing lose detail?
Very dark output can compress shadows. A slightly lifted charcoal or softer black may preserve more fabric structure.
Final takeaway
How to Change the Color of Clothes in a Photo With AI works best as a controlled visual comparison: begin with a clear source, define one clothing goal, keep identity and scene stable, and reject any result where garment geometry, anatomy, material, lighting, or nearby background stop agreeing with one another.
For change clothing color in photo with AI, the strongest final image should feel like the original photograph with a believable styling decision—not like a different person or scene reconstructed around the clothes.