
AI AGENT · CLOTHING BY PROMPT · SMARTGENIUSAI
How to Change Clothes in a Photo With an AI Prompt
Changing clothes by prompt gives you more control than choosing a generic outfit preset because you can describe garment type, color, material, fit and overall style in ordinary language. The challenge is to replace the wardrobe while keeping the same person, pose, proportions and scene.
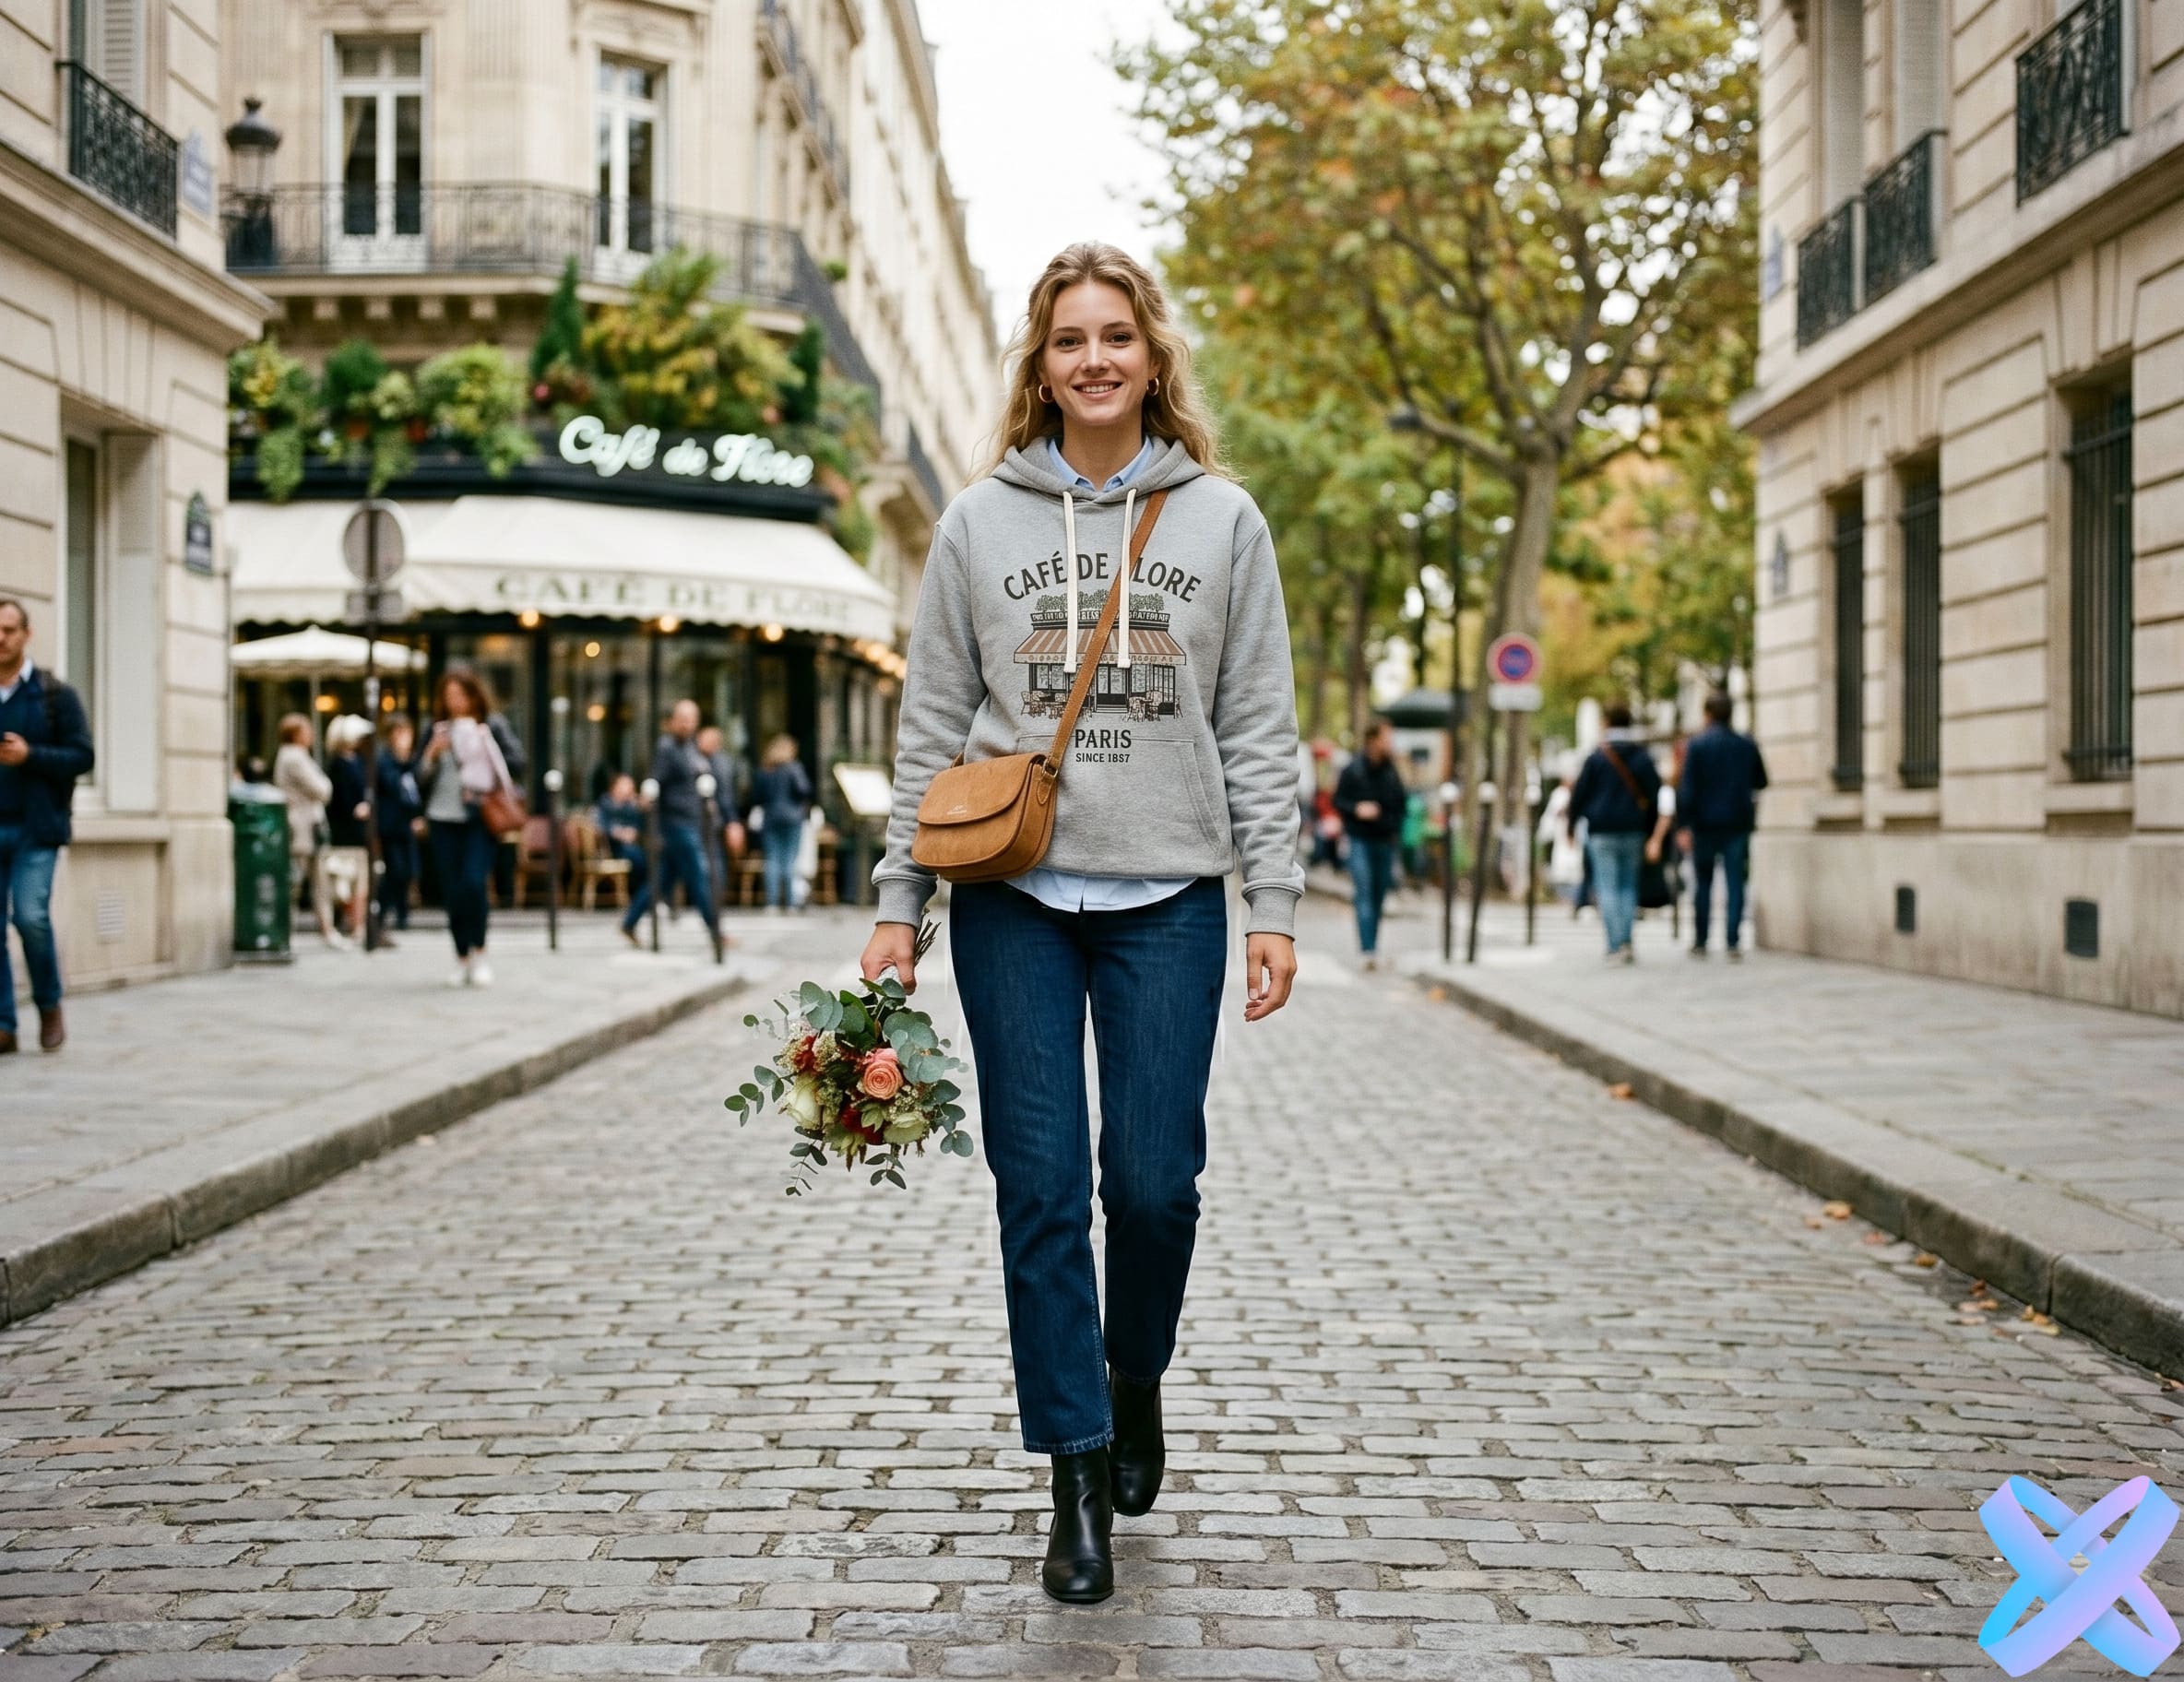
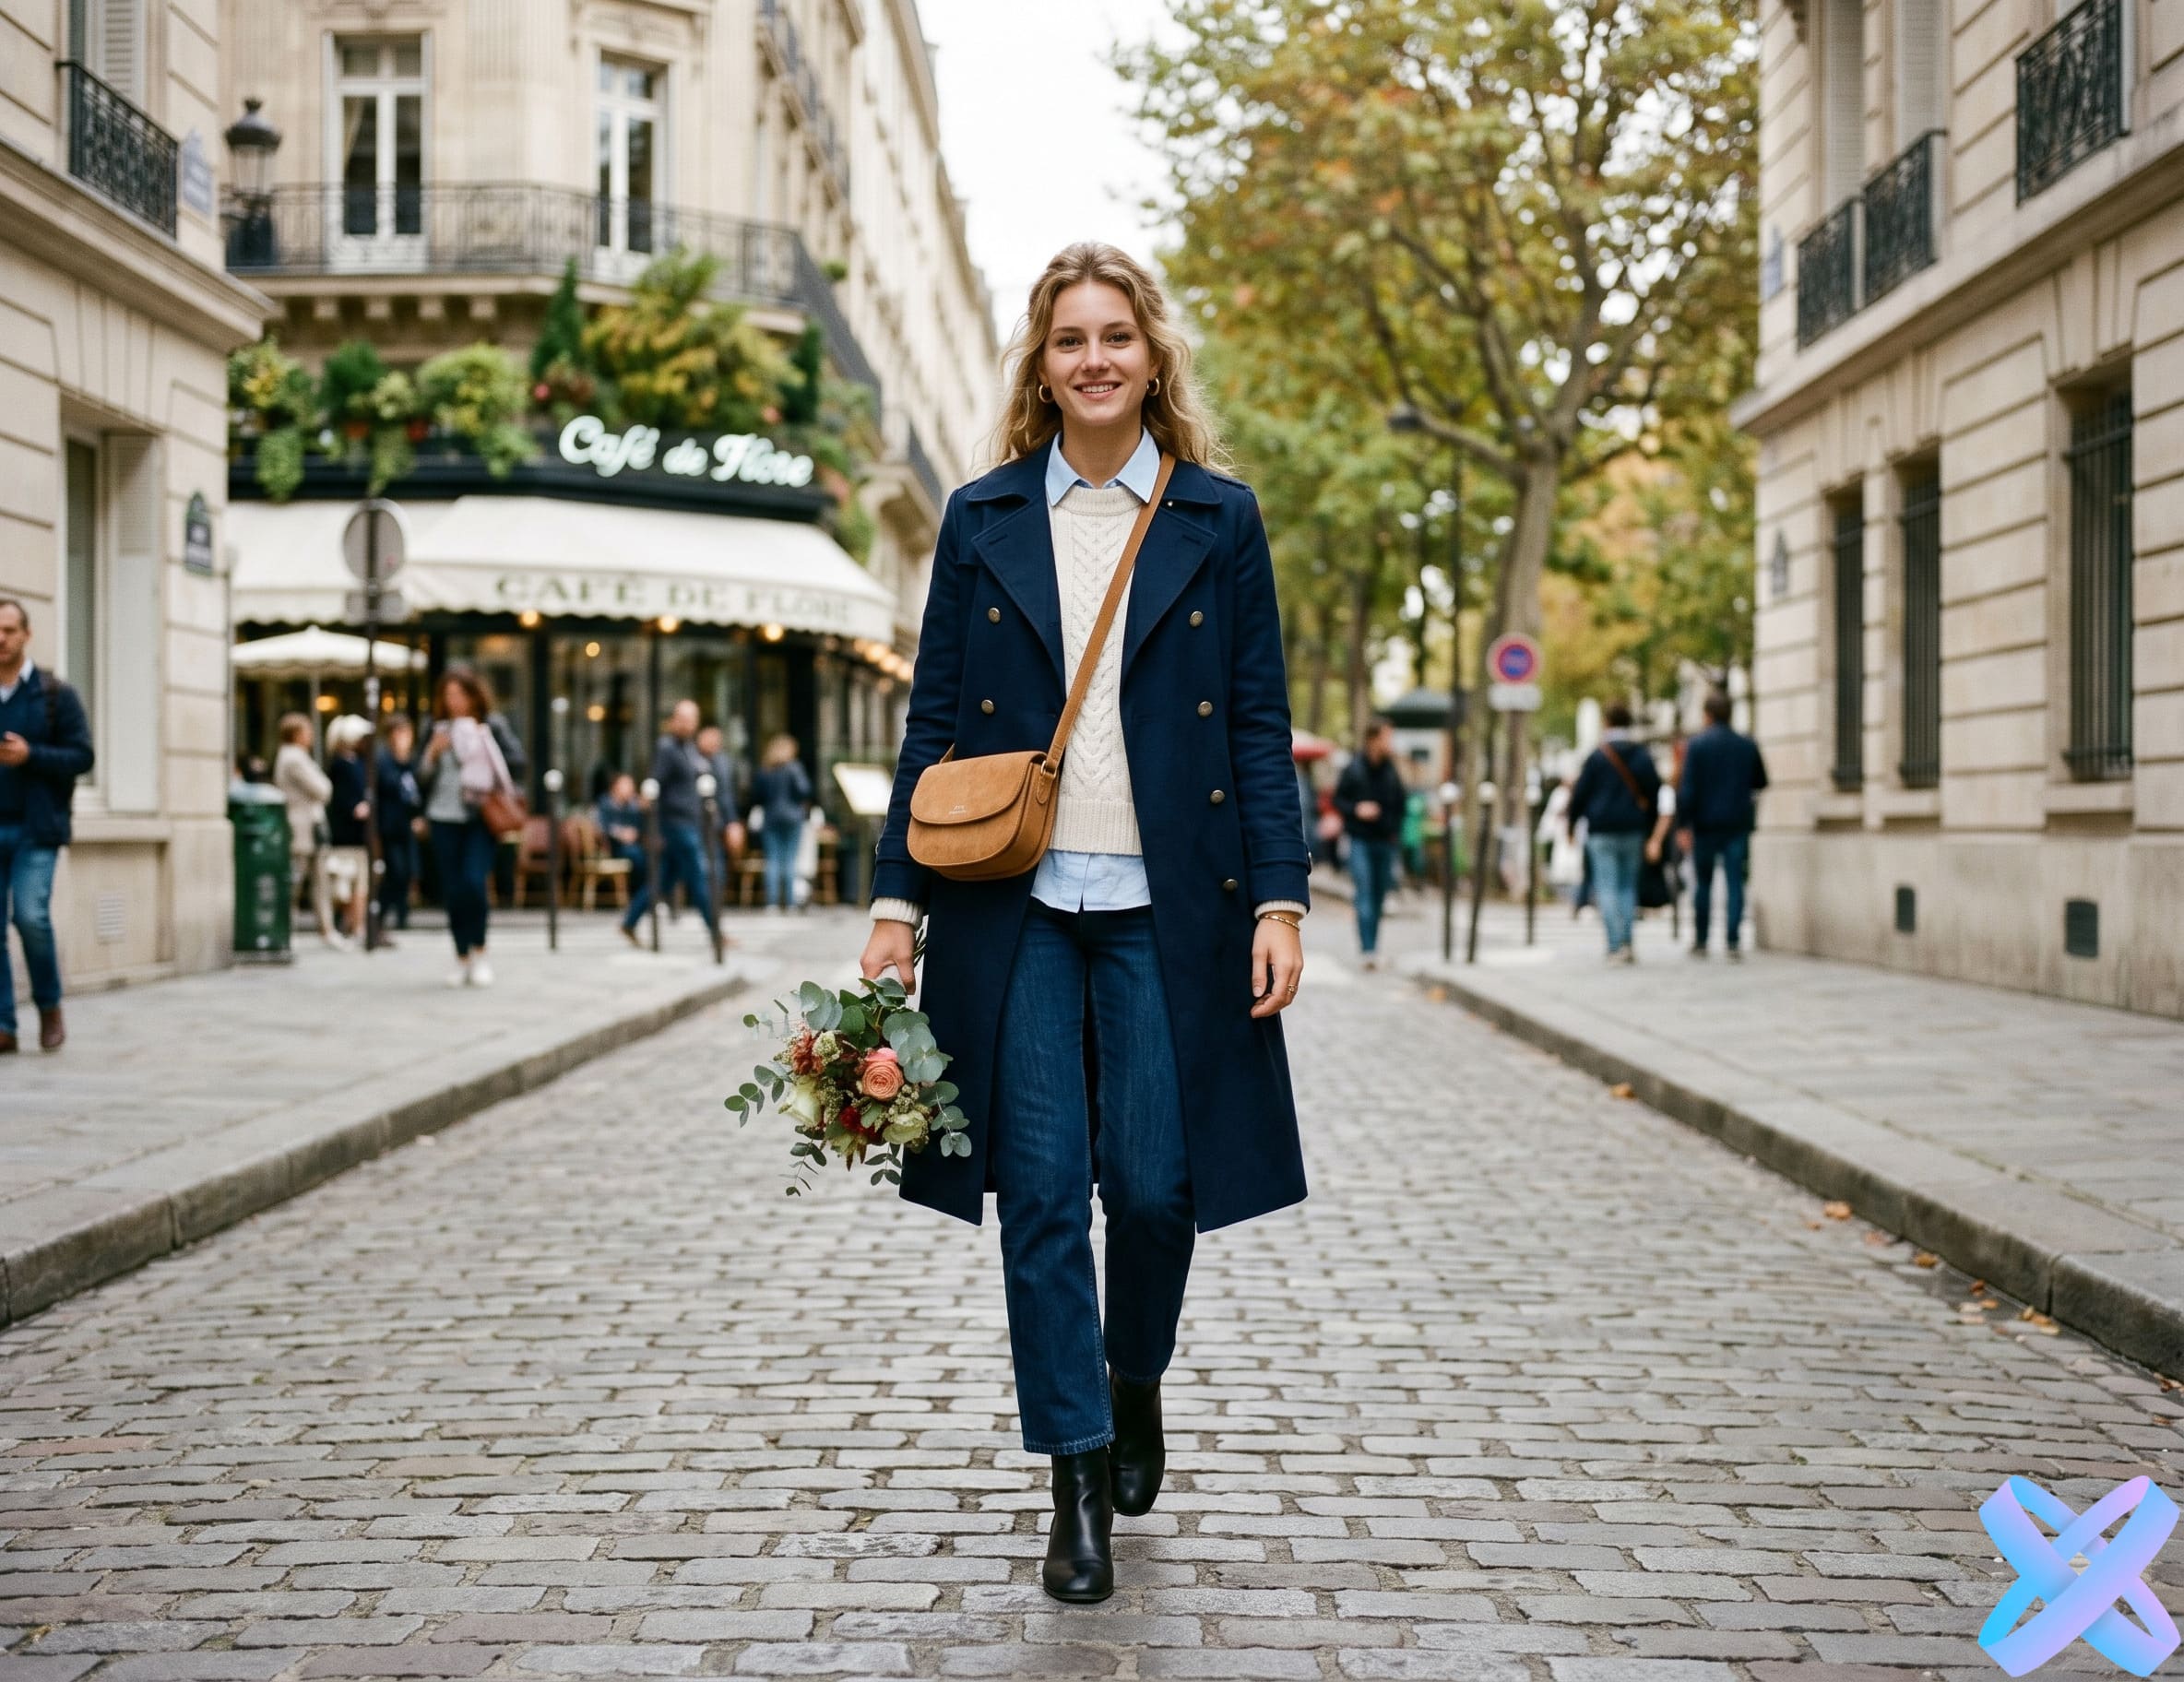
Replace clothing with a specific described look while preserving identity, body structure, pose and believable fabric interaction. Treat the Agent as a visual production assistant: give it an observable job, protect the parts that are already right, and inspect the result rather than assuming a fluent prompt guarantees accuracy.
What change clothes in a photo with an AI prompt actually asks the model to do
Changing clothes by prompt gives you more control than choosing a generic outfit preset because you can describe garment type, color, material, fit and overall style in ordinary language. The challenge is to replace the wardrobe while keeping the same person, pose, proportions and scene.
The Agent receives both the image and the instruction. It has to identify the relevant subject, understand what should change, reconstruct affected pixels and blend the new content into the existing photo. That means prompt quality and source quality work together: a perfect sentence cannot reveal visual information that the source never contained.
Treat the Agent as a visual production assistant: give it an observable job, protect the parts that are already right, and inspect the result rather than assuming a fluent prompt guarantees accuracy.
Start with a source that makes the task possible
Use a photo where the existing clothing and body are visible enough to understand fit. Crossed arms, large foreground objects or a crop that removes the waist can make full outfit replacement harder because the model has less information about garment boundaries.
Look for sharp edges, readable facial or product detail, enough resolution and enough space around the area that will change. Heavy blur, extreme compression, blocked anatomy, tiny labels or a crop that removes necessary context increases how much the Agent must invent.
Do not choose a source only because the expression or color is attractive. Choose the version that gives the model the clearest evidence for the edit you actually want to perform.
Define the change and the preserve list separately
Explicitly protect the face, hair, body proportions, pose, hands and background. If the original lighting already works, ask the new fabric to follow that same direction and intensity.
This separation matters because a generative edit does not automatically know which areas you consider finished. “Change the background” tells the model the transformation, but “keep the face, outfit, pose and camera angle unchanged” defines the boundaries.
If a result keeps changing something important, move that item into the preserve list. If a result barely changes at all, strengthen the main action instead of adding more style adjectives.
A repeatable AI Agent workflow
Define one primary objective
Write the main action first. If several edits are needed, decide which one controls the direction of the result.
Add the visual specifics
Describe the scene, garment, color, material, lighting or cleanup detail that makes the request measurable.
Protect the source anchors
List the face, product, pose, proportions, camera angle, label or environment details that must remain stable.
Generate and inspect in passes
Check the requested change first, then preservation, realism and small artifacts before continuing to another edit.
After the first result, compare it with the source and make a decision: accept, refine one instruction, or split the project into another focused stage. Controlled iteration is faster than rewriting the entire brief after every attempt.
Where this workflow is useful
- Turn casual clothing into a business look for a portrait.
- Test a dress, jacket or sportswear concept without reshooting.
- Create fashion variations for social content.
- Prepare alternate model visuals for a clothing idea or campaign concept.
These scenarios work best when the source already contains something worth preserving. The Agent is not only a generator; it is most useful when it transforms a good existing image into a more useful version without discarding the original identity, product or composition.
Describe clothing in layers
Garment type, color, material and fit are more actionable than a broad style label. “Oversized beige wool coat over a black turtleneck” gives the Agent clearer structure than “luxury winter fashion.”
Fabric must react to pose
A new jacket still has to bend at elbows; a dress must follow hips and legs; a shirt collar must connect to neck and shoulders. Review clothing as part of anatomy, not as a flat texture pasted onto the body.
Reference images are not exact try-on guarantees
A reference can guide color, style, shape and material, but generative clothing transfer is not a perfect one-to-one garment fitting system. Exact product fidelity requires careful comparison and sometimes a more specialized e-commerce workflow.
Prompt structure that is easy to control
A practical prompt can be written in four parts: main action → visual specifics → preserve list → realism constraint. The exact words can stay natural. The important part is the hierarchy.
For example, instead of “make this professional,” describe what professional means visually: neutral background, controlled soft light, cleaner clothing, natural skin, same face. Instead of “make the product premium,” define surface, background, light and the exact product details that must not change.
Replace the hoodie with a tailored charcoal business suit and white shirt, keep the same face, pose, body proportions and office background.
Change the outfit to a light beige linen summer set with natural fabric folds; preserve the person, lighting and camera angle.
Replace the current clothing with a minimalist black evening dress, keep hairstyle, face, pose and background unchanged.
How much detail should an Agent prompt contain?
Use enough detail to remove ambiguity, but stop when every new phrase starts introducing another creative direction. A short precise prompt often produces a more controllable result than a paragraph that mixes mood, camera language, styling, background, anatomy and unrelated enhancement.
If the request contains several independent transformations, order them. Put the main transformation first, supporting changes second and preservation constraints last. When exactness matters, consider making the second transformation only after the first result is approved.
How to keep the result realistic
The new outfit should fit the same body and posture. Sleeves, collars, waistlines and folds should follow anatomy, while the face and background remain recognizably the same.
Inspect the physical relationships that the edit touches. New objects need contact shadows, backgrounds need compatible perspective, clothing must follow the body, recolored materials must retain highlights, and product scenes need correct scale. A visually attractive edit can still feel fake when one of those physical cues disagrees with the source.
Also compare global image character. If the source is softly lit and low contrast, a hyper-sharp generated element can look pasted in even when its shape is correct. The new content should inherit the camera and lighting logic of the frame.
Common mistakes with change clothes in a photo with an AI prompt
| Problem | Better approach |
|---|---|
| Describing | Describing only “stylish clothes” without garment details. Revise the request so the Agent has one clear priority and enough source information to reconstruct the change. |
| Requesting | Requesting exact logos or tiny printed text and assuming perfect fidelity. Revise the request so the Agent has one clear priority and enough source information to reconstruct the change. |
| Changing | Changing clothing, pose and body shape at the same time. Revise the request so the Agent has one clear priority and enough source information to reconstruct the change. |
| Ignoring | Ignoring whether hands overlap the garment. Revise the request so the Agent has one clear priority and enough source information to reconstruct the change. |
| Accepting | Accepting fabric folds that do not follow the body. Revise the request so the Agent has one clear priority and enough source information to reconstruct the change. |
When a generation goes wrong, identify the first broken cue instead of grading the image as “bad.” Is the wrong object edited? Did identity change? Did the model ignore the preserve list? Is perspective impossible? The next prompt should address that specific failure.
Review the result in separate passes
Do not judge everything at once. First check whether the Agent performed the requested action. Then compare preserved details. Finally inspect realism, artifacts and composition. This keeps an impressive creative change from distracting you from a small but important error.
- Main: review main requested change against the source at full resolution before approving the edit.
- Preserved: review preserved source details against the source at full resolution before approving the edit.
- Scale: review scale and perspective against the source at full resolution before approving the edit.
- Materials: review materials and texture against the source at full resolution before approving the edit.
- Occlusion: review occlusion boundaries against the source at full resolution before approving the edit.
- Color: review color consistency against the source at full resolution before approving the edit.
- Small: review small artifacts at full resolution against the source at full resolution before approving the edit.
Zoom out at the end. A result can pass every close-up test and still feel awkward as a whole because the subject no longer balances with the background, the crop is weak or the new element draws too much attention.
When to use a specialized SmartGeniusAI tool instead
If the task maps exactly to a focused workflow—such as Remove Background, Pose Changer, Hair, Emotion, Photo Enhancement or a standard Product Creative preset—the specialized tool can be faster and easier to evaluate. Agent is strongest when the request is custom, language-specific or combines related edits that would otherwise require several interfaces.
You can also combine both approaches. Use Agent to establish the custom concept, then open the result in the AI Photo Editor or a focused tool for final correction. The best workflow is the one that changes only what still needs work.
Try this workflow with SmartGeniusAI Agent
Upload a strong source, describe the main edit in plain language, protect the details that matter, compare the result with the original and continue only after the important constraints survive.
Frequently asked questions
Do I need to choose the edit type manually?
No. On the AI Agent page you describe the desired result in plain language and the Agent determines the most suitable edit direction from the prompt.
Can one prompt contain more than one action?
Yes, but combined instructions are more stable when the main action comes first and supporting changes are ordered clearly. For difficult jobs, two controlled stages can be safer than one overloaded prompt.
What should I tell the Agent to preserve?
Protect the details that define the source for this task. In this workflow, explicitly protect the face, hair, body proportions, pose, hands and background. If the original lighting already works, ask the new fabric to follow that same direction and intensity.
Can I continue editing the result?
Yes. After the Agent creates the main transformation, you can continue in the SmartGeniusAI Editor or use a more focused tool for correction, background, enhancement or another specific change.
Are AI edits always exact?
No. The result is generative. Faces, products, labels, small text, materials and geometry should be checked carefully when accuracy matters.
Final takeaway
How to Change Clothes in a Photo With an AI Prompt works best when the prompt behaves like a clear creative brief rather than a collection of adjectives. Define the action, describe the important visual details and protect the source elements that should not move.
The Agent gives you flexibility, but quality still comes from controlled decisions. Strong source information, explicit preservation, physical realism and staged iteration are what turn a text command into a useful photo edit rather than an unpredictable regeneration.