
AI CLOTHING GUIDE · SMARTGENIUSAI
How to Try a Suit on Your Photo With AI
A suit is one of the most structured garments you can generate, which is why small alignment errors are easy to notice. Shoulders, lapels, collar, buttons, cuffs, trouser crease, and jacket length create strong lines that need to agree with the person’s posture and perspective.
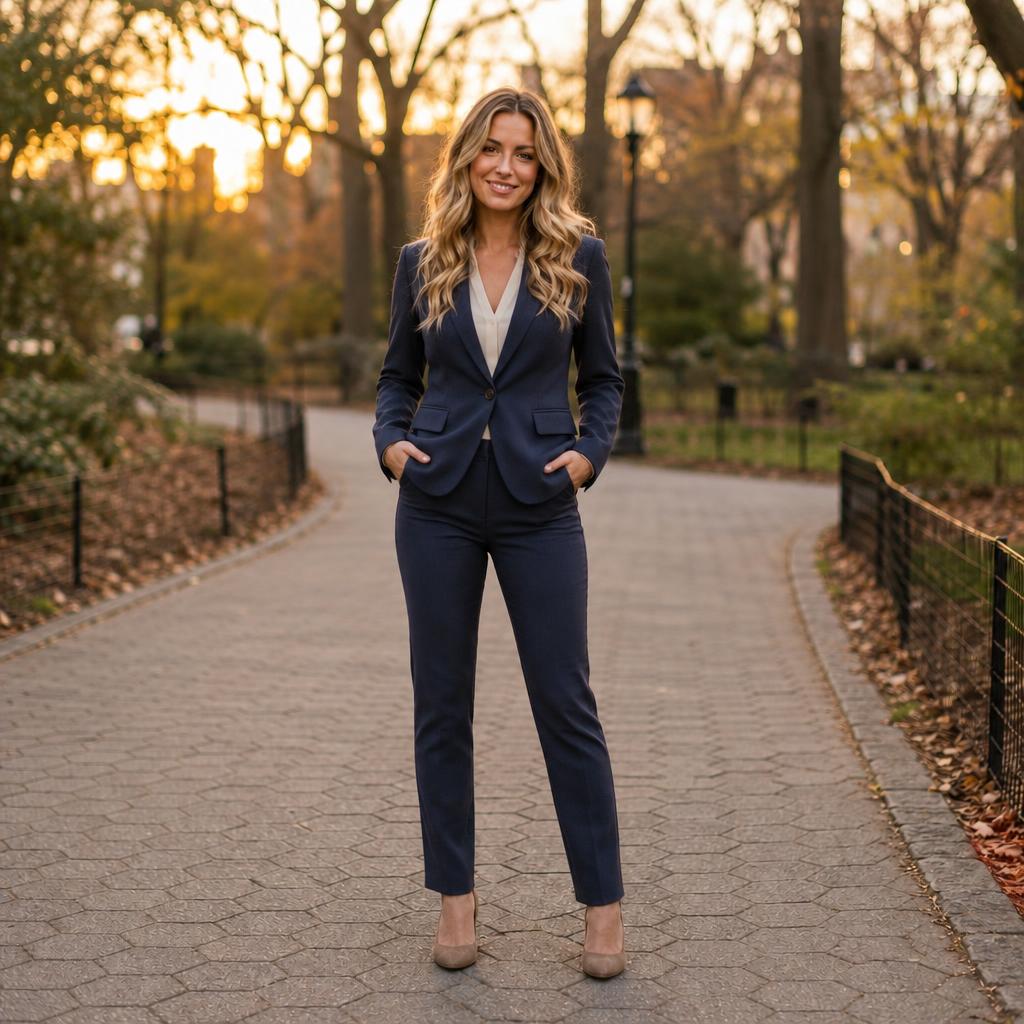
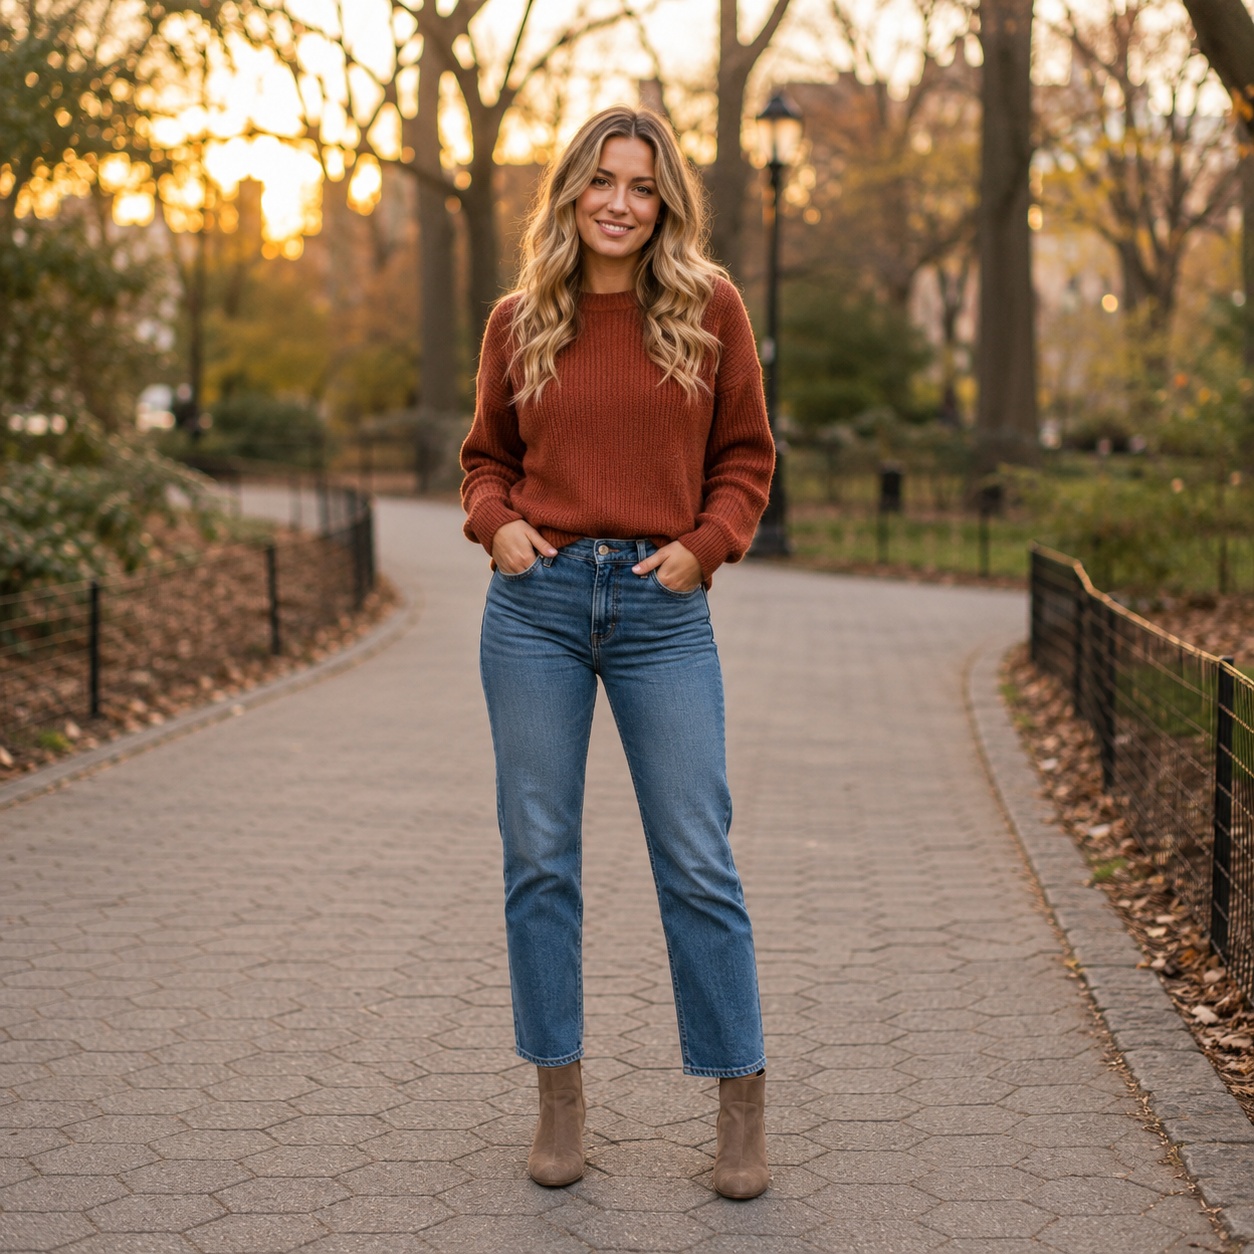
Suit realism is mostly geometry. If the shoulders, lapels, collar, and jacket opening line up correctly, the result can look convincing even before you inspect tiny fabric texture.
Why this clothing edit is useful
For try suit on photo with AI, the value of AI is the ability to compare one styling decision on the same photograph instead of trying to imagine the result from a product photo or text description. Keeping the person and scene stable makes the clothing change easier to judge.
A try suit on photo with AI preview is still a generated visualization rather than a physical fitting room. Real size, tailoring, fabric stretch, construction and comfort cannot be measured from the synthetic image, so use the result to explore appearance and direction rather than to claim exact fit.
Start with shoulder fit
The jacket shoulder seam should sit where the visible shoulder actually turns. A generated suit with shoulders too wide or too narrow changes the body shape and immediately reads as artificial.
Three-quarter poses are possible, but check that the far shoulder is foreshortened naturally instead of becoming symmetrical with the near shoulder.
Check the collar, lapel, and shirt as one system
A shirt collar should sit inside the jacket collar, lapels should meet the jacket opening cleanly, and any tie should emerge from the center without cutting through fabric.
These details are tightly connected. A technically beautiful lapel cannot save a collar that floats away from the neck or a tie that changes width unpredictably.
Choose suit style by the purpose of the photo
A conservative navy or charcoal suit works differently from a fashion-forward double-breasted cut or a lighter casual suit. For LinkedIn and corporate portraits, restraint may be more useful than a dramatic editorial design.
For creative content, stronger colors, wider lapels, or unusual fabrics can make sense. Define the context before judging which generated result is “better.”
Full-body suit edits require consistent trousers and shoes
When the frame includes legs, the jacket cannot be evaluated in isolation. Trouser rise, break, crease, and shoe shape need to form a coherent outfit.
If the source has crossed legs, seated posture, or objects covering the lower body, a full suit generation becomes harder because the model must rebuild multiple overlapping fabric regions.
Keep accessories under control
Pocket squares, ties, belts, watches, and jewelry can improve the look but also create extra failure points. Start with a clean suit and add optional accessories only when the core tailoring is stable.
Text, logos, patterned ties, and intricate cuff details should be checked closely because generative models may distort repeating or symbolic elements.
Perspective should control tailoring symmetry
In a straight-on portrait, lapels can appear nearly symmetrical. In a three-quarter pose, the far side should compress with perspective. Perfect mirror symmetry on an angled body can look less realistic than a small intentional difference — apply this specifically when evaluating try suit on photo with AI.
Use the face, shoulders, and original shirt line as references for the body orientation when checking the generated jacket — apply this specifically when evaluating try suit on photo with AI.
Fabric weight changes the character of a suit
Structured wool, soft flannel, linen blends, and fashion satin do not create the same edge sharpness or folds. Material affects whether the suit reads as corporate, seasonal, relaxed, or editorial — apply this specifically when evaluating try suit on photo with AI.
A prompt can include material when it matters, but do not rely on material words to fix incorrect tailoring geometry. Structure comes first — apply this specifically when evaluating try suit on photo with AI.
A controlled workflow you can repeat
Prepare the source
Use a clear portrait where shoulders and torso are visible.
Set one clothing goal
Choose a suit direction appropriate to the intended photo.
Generate and compare
Inspect shoulder seam, collar, lapels, buttons, cuffs, and jacket length.
Refine the strongest result
For full-body images, continue the review through trousers, shoes, and floor contact.
For this “How to Try a Suit on Your Photo With AI” workflow, open the matching SmartGeniusAI Clothing tool and keep the original image available beside the generated result. That side-by-side reference makes it easier to notice whether clothing changed cleanly without unnecessary identity, pose, or scene drift.
Quality-control checklist
| # | Check | How to review it |
|---|---|---|
| 1 | Shoulder width matches the source anatomy | Review this point specifically in the context of try suit on photo with AI before approving the draft image. |
| 2 | Lapels and collar stay symmetrical in perspective | Review this point specifically in the context of try suit on photo with AI before approving the draft image. |
| 3 | Tie or shirt placket aligns with the torso | Review this point specifically in the context of try suit on photo with AI before approving the draft image. |
| 4 | Jacket opening follows the stance | Review this point specifically in the context of try suit on photo with AI before approving the draft image. |
| 5 | Hands do not merge into cuffs or pockets | Review this point specifically in the context of try suit on photo with AI before approving the draft image. |
| 6 | Trousers and shoes complete the same style direction | Review this point specifically in the context of try suit on photo with AI before approving the draft image. |
A practical comparison exercise
Create three versions specifically for try suit on photo with AI: a conservative option that changes as little as possible, a balanced option that clearly expresses the intended style, and a stronger creative option. Keep the source photo, crop and pose identical across all three. This gives you a useful range instead of three nearly identical generations.
First compare the versions at normal viewing size and decide which one belongs most naturally in the original photograph. Then inspect shoulder width matches the source anatomy and lapels and collar stay symmetrical in perspective. If the strongest creative option introduces structural errors, do not reward it simply because it looks more dramatic; the balanced candidate is often the better result for a realistic photo.
Finally, imagine where the image will be used. A social concept can tolerate more expressive styling than a professional profile, shopping visualization, or practical wardrobe comparison. For try suit on photo with AI, context should decide how much novelty is useful and how much consistency with the source should be protected.
Review the edit at three viewing distances
At thumbnail size, judge overall silhouette and whether the clothing belongs in the scene. At normal viewing size, inspect fit, layers, and color balance. At close zoom, check hands, hair, seams, buttons, patterns, and background edges — apply this specifically when evaluating try suit on photo with AI.
This order prevents you from spending time on tiny details in an image whose overall outfit direction is already wrong — apply this specifically when evaluating try suit on photo with AI.
Know when to regenerate instead of repairing
Regenerate when the failure is structural: missing fingers, impossible garment geometry, severe background warping, or identity drift. Those problems are usually more expensive to repair manually than to solve with a better generation — apply this specifically when evaluating try suit on photo with AI.
Minor texture issues, a tiny seam inconsistency, or small color cleanup may be reasonable to retouch later if the core anatomy and clothing structure are already strong — apply this specifically when evaluating try suit on photo with AI.
How to compare two good candidates
When two versions for try suit on photo with AI both look technically clean, compare the purpose of the image instead of searching endlessly for microscopic differences. Ask which result supports the person, occasion and visual message with less explanation.
For How to Try a Suit on Your Photo With AI, coherence should beat novelty. A slightly simpler garment that follows the photographed pose, lighting and environment is usually more convincing than an elaborate option with one distracting structural error.
Common mistakes to avoid
- Changing pose, background, body shape and clothing together while trying to evaluate try suit on photo with AI.
- Using a tiny or heavily compressed source when the article goal is try suit on photo with AI.
- Keeping a try suit on photo with AI result with broken hands, collars or background geometry only because the overall style is attractive.
- Assuming a generated try suit on photo with AI preview predicts real garment size, tailoring or physical comfort.
- Judging only the center of the outfit in a try suit on photo with AI edit and forgetting hair overlap, accessories, hems and scene boundaries.
Try this Clothing workflow on your own photo
Use the matching SmartGeniusAI tool for try suit on photo with AI, keep the source fixed, and compare one controlled clothing change at a time.
Use generated clothing previews responsibly
A generated image created for try suit on photo with AI is useful for styling exploration, creative concepts, profile-photo experiments and visual planning, but it should not be presented as proof that a particular real product will fit in exactly the same way.
When sharing a realistic try suit on photo with AI result, use images you have the right to edit and avoid misleading viewers about a person, product, endorsement, or before-and-after claim. Clear labeling is appropriate when the edited nature of the image would otherwise be easy to misunderstand.
Frequently asked questions
Can I add a business suit to a casual photo?
Yes, but consider whether the environment supports the look if realism is important.
Do I need a full-body photo?
No. A waist-up portrait is often enough for professional profile use. Full-body sources are needed to judge trousers and shoes.
Can I preview different suit colors?
Yes. Navy, charcoal, black, beige and other directions can be compared on the same source.
Why do lapels sometimes look uneven?
Strong pose angles, hair overlap, low resolution, and complex jackets can make structured edges harder to reconstruct.
Can AI replace my outfit with a suit for LinkedIn?
It can create a visual suit edit, but review the result carefully and make sure the final image remains an honest representation appropriate for the platform and context.
Final takeaway
How to Try a Suit on Your Photo With AI works best as a controlled visual comparison: begin with a clear source, define one clothing goal, keep identity and scene stable, and reject any result where garment geometry, anatomy, material, lighting, or nearby background stop agreeing with one another.
For try suit on photo with AI, the strongest final image should feel like the original photograph with a believable styling decision—not like a different person or scene reconstructed around the clothes.